

Can An Old Tub Be Painted
Have an ugly bathtub or shower surroundings? What if I told you you can paint your bathtub to arrive look fresh, clean, and beautiful?! Read on to learn how to paint a bathtub!
Note: This post was originally published in February of 2019. I'm updating and republishing it in an effort to give some new life to sometime projects!

This post contains affiliate links. Click here to read my total disclosure policy.
Ugly bathtubs are the worst.
When my husband and I lived in our first apartment together, we had a mustard yellow bathtub and environs – and not in a cute, vintage fashion. It was and so bad, and I cringed a little every time I had to utilise it!
In this home, our bathtub wasn't quite as horrifying simply it was pretty darn ugly. The tub was a marbled off-white that always felt dirty, and the tiles were a different colour of fair that had seen better years.
I knew there had to exist an affordable fashion to fix it, then I did some research and decided to try out Rust-Oleum's Tub & Tile Refinishing Kit. It brightened the entire room upwardly significantly, and now the bathtub really feels make clean when I make clean information technology.
What a novel concept!
This bathroom too saw a lot of other changes – all very affordably. Read to the end of the post for all of the details on how we totally transformed this bath using (virtually) nothing but paint!
Refinishing your bathtub is one of those projects that seems incredibly intimidating if you aren't super comfortable with DIY. I want to accept a moment to assure yous that information technology'due south non that hard. As long as you follow the directions and take your fourth dimension, yous will terminate upwardly with a gorgeous result that volition fool everyone into thinking your tub has always been bright and shiny.
My favorite thing about this project is how admittedly affordable it is to completely change the expect of your bathtub. The kit but costs near $25 and covers a standard-sized tub. We accept a garden tub (and I was applying the epoxy to the tile besides), so I ended upwards using three kits. I could have easily gotten away with merely two if I had waited a fiddling longer betwixt the beginning and second coat (I had to do three coats on the bathtub, which is why I needed the third kit), but $75 for a projection this transformative is so good it's silly!

This project took me virtually 3 days to complete. If you don't have a five-yr-old and a teething baby in your business firm, you could probably knock information technology out in just i. I'll detail the timeline below (and why I needed a third coat, and so you can avert my mistakes).
The kit requires that you allow it to dry out for a full three days before you shower in it once again, so be aware of that before you lot start this project! If you don't have a secondary bathroom, plan on borrowing a friend'southward shower or heading to the gym to make clean up.
Or, you know, just embrace the stink. It'll make your offset shower in your newly-refinished tub that much sweeter.
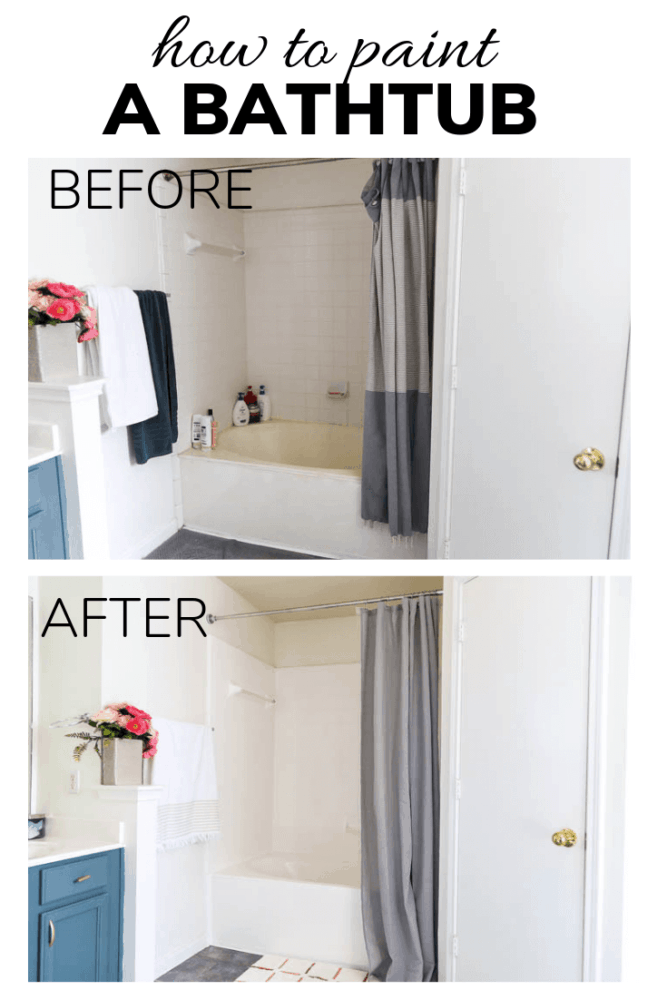
Okay, let'due south do this. Here'due south a reminder of what our tub looked like BEFORE I got started.


How to Paint a Bathtub Using Rust-Oleum'southward Tub & Tile Refinishing Kit
Note: In this postal service, I detail the steps for usingRust-Oleum'south Tub and Tile Refinishing Kit. Please feel costless to use this as a reference, but please do Non attempt this project without fully reading the instructions that come with the kit!
Pace One: Clean Tub & Remove Caulk

The directions land that y'all should clean the tub earlier removing the caulk, only I knew I was going to make a giant mess removing the caulk anyways, and then I decided to tackle that outset.
To remove the caulk, I just used a sharp razor blade and ran it along either side of the caulk, then peeled it up.
This sounds incredibly simple and quick, and it'due south not hard (at all!), merely it will definitely crave some elbow grease! I'd estimate that information technology took me almost 40 minutes to remove all of the caulk around the bathtub. But put on a practiced podcast and tell yourself that you lot're getting your strength training workout in for the twenty-four hours.
One time your caulk has been removed, it's time to clean.
Y'all'll demand to thoroughly clean your tub (Rust-Oleum recommends using a mix of bleach and water) and make certain to become upward whatever mildew or soap scum. Subsequently your showtime round of cleaning is finished, sand the entire tub and tile surface area with 400 (or 600) grit sandpaper. I just sanded it by hand, but if yous've got a power sander on hand that would probably be more effective.
Please note: Don't skip the sanding step! If you don't take a power sander that'due south fine (that'southward exactly why I didn't use mine – to make sure information technology would piece of work if you wanted to do it by hand). The whole point of the sanding it to knock some of the glossiness off the tub and tile and prepare it to accept the epoxy. This step is vital!
Later on sanding, rinse everything off and make clean it again. You want the tub to be the cleanest you've ever seen it, because yous don't desire to paint any dirt or hair into the bathtub. If yous practice, it'll exist stuck there forever!
Allow the bathtub to fully dry before painting it (I wiped mine down with a towel once I finished cleaning to speed upward the drying process).
Stride Two: Mix the Epoxy

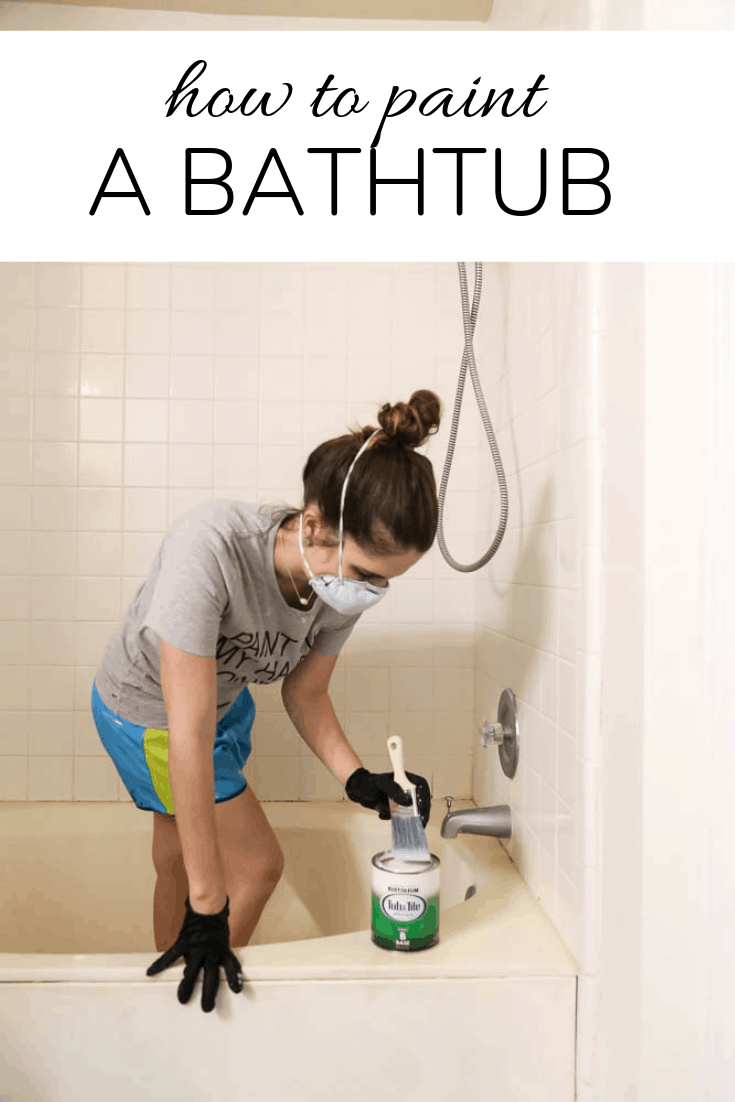
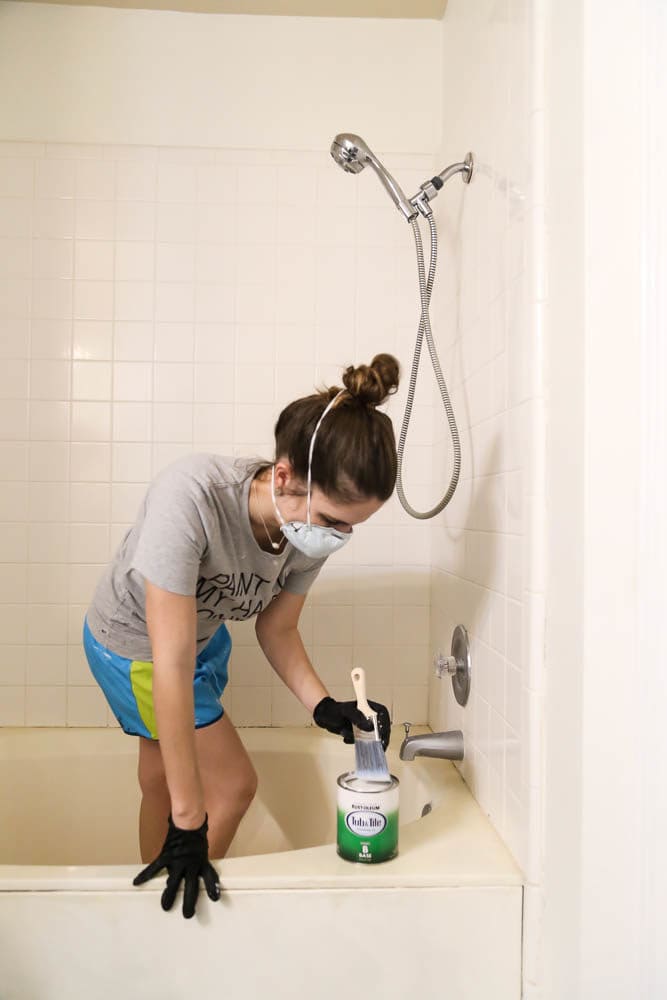
Here'south where I'll make a note about the scent of this epoxy: Information technology's strong!
Be sure that you're wearing a mask while y'all work, and I would even recommend some protective eyewear if you're sensitive to this stuff (I well-nigh never wear a mask because I detest how they experience, but I wouldn't have survived without mine!). You'll too desire to open a window in the bathroom and if you've got a standing fan, place it in front of the window to help the fumes escape the room.
I kept the bathroom door closed while I worked, merely of grade some of the odor did escape to the rest of the house. We found that the best manner to go along it from bothering us was to open up the windows throughout the house and light a few candles. Later nigh an hour or so, it wasn't even noticeable! Even better? Do your painting first thing in the morn, then take the whole family head out for some errands – leave a couple of windows open while you lot're gone and let the house air out.
The tub and tile refinishing kit comes with a two-role epoxy. You'll open both of them, stir them, then mix them together.
You'll probably detect that the mixture is much thinner than regular pigment. The key is that y'all have to stir the epoxy for a minimum of ii full minutes before yous attempt to pigment with information technology! The box isn't specific well-nigh how long to stir for, and it technically doesn't crave whatsoever wait time earlier painting, but I found that stirring for a good 2-3 minutes was the best mode to get the mixture to thicken up enough that information technology didn't drip while I was painting. Don't skip this stride!
Step Three: Start Painting Your Tub!
This is the part where, if you're anything similar me, y'all'll start having panic attacks correct earlier you start.
I mean, this is a big project. Tubs aren't easy to replace. Projects similar this tin can exist intimidating – I go it. The best style to become over that fear is to just dip your brush in the pigment and DO Information technology. Once you've brushed a bit on, it's as well tardily to go back so yous might every bit well motion forward.
I requite yous permission to even close your eyes for that commencement brushstroke. But please open up them up after so you don't make a mess.
You'll want to apply a foam roller or a really high-quality paintbrush to paint your tub. You could use a paint sprayer (it's honestly probably the all-time way to become a totally shine end) but I didn't quite trust myself with spraying epoxy in my bath. I'm just a bit too accident prone. I used a combination of a small cream roller and a paintbrush, and it worked slap-up.
Be sure to cover up or remove and drains or metal pieces that you don't want to accidentally go epoxy on (full disclosure: I skipped this step and have a chip of paint on my drain now. Whoops!).

Later you've finished the first glaze, the box recommends you lot wait an 60 minutes before doing the second. I plant that an hour was keen for the tile and the outside of the tub, but when I stepped in the tub to reach the top of the tile, I smudged the epoxy a bit. I call back a lot of it has to do with the temperature and climate that y'all're working in, so I'd recommend giving it two hours earlier doing the second coat, just to be on the safety side! The epoxy has a working time of half-dozen hours before you need to toss information technology, so you don't take to rush.
Because of my smudging, I did accept to do a third coat on the tub – if yous need a third coat, you have to wait 24 hours earlier adding it.
Step 4: Re-Caulk
The directions actually don't note exactly how long to look before re-caulking. You have to wait three days after painting before exposing the bathtub to water, but it says that the epoxy is cured subsequently 18 hours. So, I split the difference and waited two days between finishing my last coat of paint and re-caulking the tub.

Hither's how the breakdown of my schedule went:
- Th: Remove caulk
- Friday evening: Paint coats i-two
- Sunday morning: Paint coat 3
- Tuesday: Re-caulk around tile and tub
- Thursday: First shower in the newly painted tub!
If you lot're able to but work without distractions (and without smudging the paint), I'd recommend removing caulk and cleaning the bathtub the evening before painting, and then spending the next morning time painting. Information technology should be pretty simple to knock out in i mean solar day, as long as you lot give a petty extra dry out fourth dimension between coats!
Nosotros had to apply our kids' bathroom for a few days while everything cured, and let me tell yous, information technology felt good to be dorsum in our bathroom when all was said and washed!


I know some of you withal accept questions – here are the answers to a few of the well-nigh-frequently-asked questions I go virtually this project. If yous accept one I missed, just drib it in the comments and I'll be certain to address information technology!
What kind of materials does this work on?
Can you pigment a plastic bathtub? Can y'all paint a fiberglass bathtub? What near porcelain tile?
Yeah, yes, yeah! This product works on porcelain, fiberglass, and and ceramic, acrylic, cast iron, and steel which means information technology'south good for just about whatsoever tub and shower surround out at that place!
how does it hold up?
Epoxy is incredibly sturdy and then you should accept absolutely no issues with your tub over time. We moved out of this house about 10 months after painting it, but after daily employ for 10 months it however looked just as skilful as it did the day we painted it!
What Kind of Caulk Should I apply?
For bathtub surrounds, I recommend DAP'southward QuikSeal Ultra caulk. If you aren't familiar with caulking or find it a petty intimidating, check out this guide to how to use caulk!
Does it go out brush marks or a texture?
No, the epoxy is pretty self-leveling and I didn't detect whatsoever brush or roller marks once it was all endeavor!
If y'all accept any issues with things still feeling a little crude, I would lightly sand it with a high-grit (600+) sandpaper to help buff out any imperfections!
How practice you clean a painted bathtub?
I didn't change my cleaning methods or tools at all later on painting our bathtub! You tin make clean with anything you would feel comfortable cleaning porcelain tile with, and it should hold upwards perfectly fine.
I'm so, so incredibly pleased with how this turned out, and I am then glad we did it. Until I started researching this, I had no idea it was even possible to paint a bathtub at habitation, and now I know that not merely is information technology possible, it'south totally affordable and not all that difficult!
Let me know if you take whatever questions about Rust-Oleum's Tub & Tile Refinishing kit, and be sure to bank check out their website for more information (and a how-to video). I can't speak to the longevity of this yet, but based on what I know virtually Rust-Oleum's other epoxy and paint products I feel confident it'll terminal united states of america a long time.
Wanna catch upwards on the other projects in this bathroom? Here's everything we did:

- Painted the vanity
- Added a cedar planked ceiling
- Added shelves higher up the toilet for extra storage
- Painted the tile
- And here's the official "later on" mail, with a look at how information technology all came together.
Source: https://www.loveandrenovations.com/how-to-paint-bathtub/
Posted by: huertanesintlefor.blogspot.com
0 Response to "Can An Old Tub Be Painted"
Post a Comment